You can create an instance using cockpit or command line cloud foundry interface. The first step for this is to navigate to space where you want to create a service instance. Navigate to Services → Service Marketplace
Now, select the service for which you want to create an instance → In the navigation area, choose Instances on left side → You can see an option to create New Instance.
You can also use search option to search for a service. When you use an enterprise account, you need to add quotas to the services you purchased in your subaccount before they appear in the service marketplace or it will only display services available in trial account.
Select the service plan from the dropdown list → Next
Next is to specify a JSON file or specify parameters in the JSON format →Next. This is an optional filed to select for instance creation and you can leave it blank and click Next.
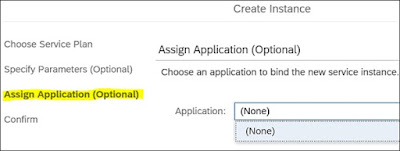
You can also assign an application that you want to bind to the new service instance, choose it from the list and click Next. This is an optional field to select.
Enter the instance name and validate parameters passed during the instance creation. You can edit any of the parameter as required. Click Finish button to complete the instance creation.
To create a service instance using Cloud Foundry Command Line interface, you can run the following command −
cf create-service SERVICE PLAN SERVICE_INSTANCE
The following parameters should be defined in above command to create s service instance −
- SERVICE − This shows the name of the service in market place to create an instance.
- PLAN − This is the name of the service plan you want to use in instance creation.
- SERVICE_INSTANCE − This is the name of the service instance. Note that you should use- alphanumeric characters, hyphens, and underscores.


No comments:
Post a Comment